|
|
2 years ago | |
|---|---|---|
| .. | ||
| README.md | 2 years ago | |
| example.png | 2 years ago | |
| wyrde was basic img resize.png | 2 years ago | |
| wyrde was basic img2img switch.png | 2 years ago | |
| wyrde was basic vae switch.png | 2 years ago | |
| wyrde was node basic move2.png | 2 years ago | |
| wyrde was node basic move3.png | 2 years ago | |
| wyrde was node basic.json | 2 years ago | |
| wyrde was node basic.png | 2 years ago | |
README.md
wyrde'a basic workflows
This is a workflow utilizing several WAS nodes.

Switching nodes
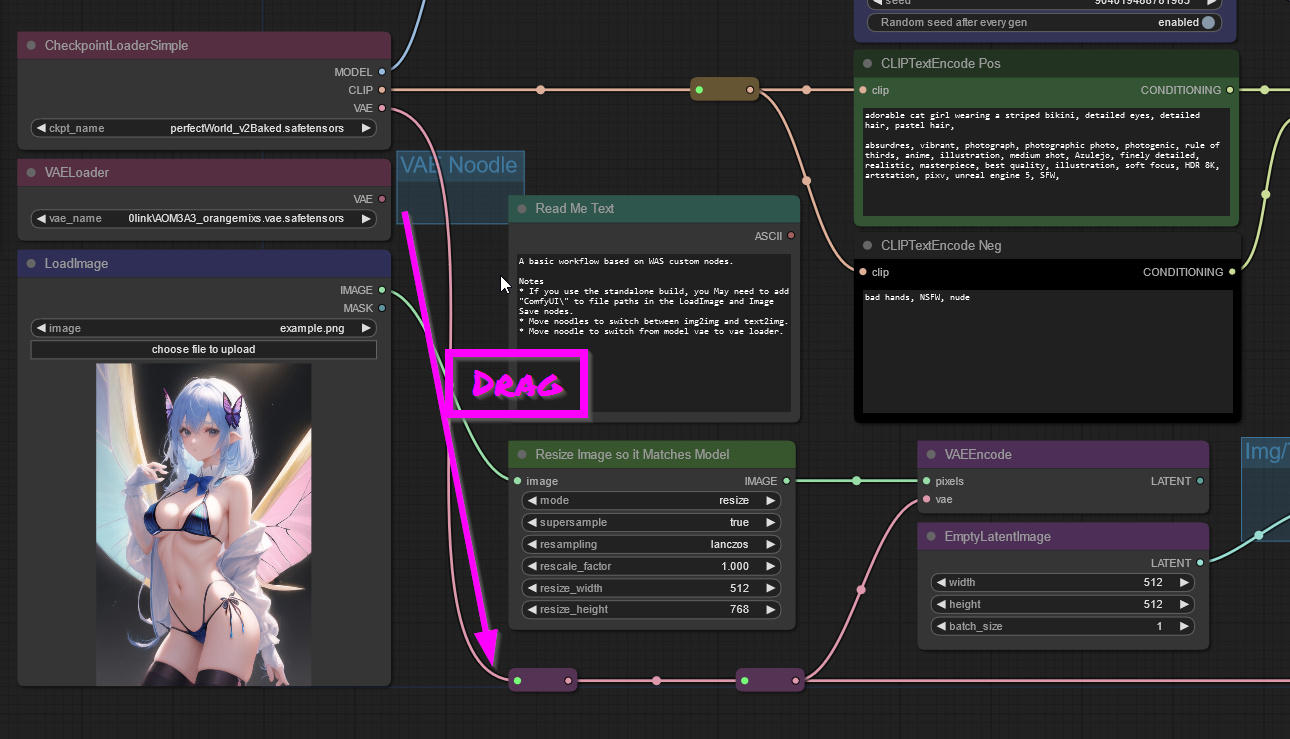
The workflow uses noodles (the lines between nodes) to switch from img2img to txt2img and baked vae to loaded vae.
- To switch from img2img to txt2img, drag a noodle from the LATENT dot on the "EmptyLatentImage" node to the redirect node in the blue box. (The old noodle is replaced.)
- Switch back by draging from the LATENT dot on the VAEEncode box to the redirect node.


Switching from baked VAE to loaded vae is similar. (Baked VAEs are included inside the model file.)
- Drag a noodle from the VAE dot in the VAELoader node to the purple redirect node below.
- To change back, drag a noodle from the VAE dot in the CheckpointLoaderSimple node to the purple redirect node below.

In stable diffusion, size does matter
When using img2img, images should be resized to better fit the model. Most models are designed for 512x512 initial generations. 768x512 and 512x768 are also common.
Large images will also suck of VRAM and time during sampling for the first generation. Instead of creating a big image in stable diffusion, it is better to go through a process called Hi-Res Fixing. That's a subject for another time, but for this basic workflow, stick to smaller initial images. (This can easily be changed to experiment with.)
Back to img2img.
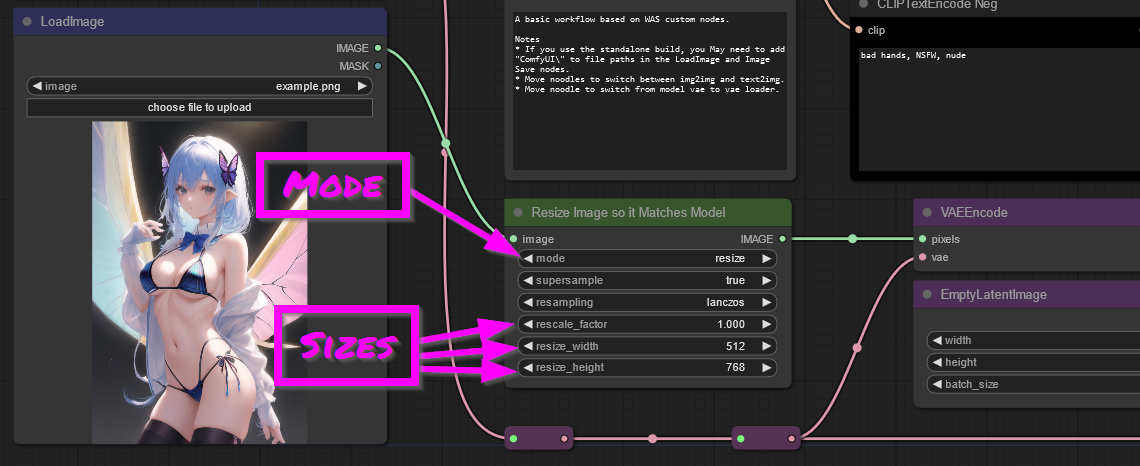
- Use the Resize Image node. The node is initially configured to resize images to 512x768. It is best to crop/alter your image in another program so it it fits 1:1 or 1:2 ratio for easy scaling. (Nodes can be used to alter images, but that's a more advanced topic.) Doesn't matter if the ratio isn't perfect, the image is a guide. Closer the better though.
- The node's "mode" can be changed from "resize" to "rescale" to easily reduce larger images as well.
